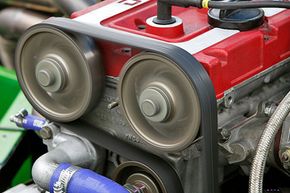
If you're timing the engine as part of a larger repair process (like replacing a timing belt), you'll want to start by getting off on the right foot -- make sure you can locate the timing marks (or notches) on the flywheel and cam. If they're worn or hard to see, you might want to mark them with a bit of white paint so they're easier to see. You don't want to be hunting for them later while you're struggling to get everything lined up.
All you need is a test light and a socket or wrench (the size of the socket will depend on your specific engine). A test light is a small hand-held tool that resembles a screwdriver with wires coming from the end. One of the wires is hooked up to the power source of whatever is being tested (in the case of engine timing, it is usually the distributor) and the other wire provides ground. (Some cost-cutting versions of the test light omit the ground wire, but they're so inexpensive anyway that it seems like a really inefficient way to save a few bucks.) The "screwdriver" tip is then touched to whatever is being tested for voltage -- if there's power, the test light will show results by illuminating a small light bulb embedded in the handle. This simple little setup is insanely useful for static timing, and also often handy when trying to troubleshoot irregularities in the electrical system.
Locate the top dead center mark on your crank pulley. (From here on out, this will be referred to as TDC, just like the repair manuals do it.) TDC can be marked on the crankshaft pulley or the flywheel, and is often found on both. Check your car's repair manual to identify the proper timing for your engine -- in degrees. It'll be in reference to TDC, such as directly at TDC or several degrees before or after TDC. The proper timing varies from car to car, so always check your owner's manual or shop manual. (At the correct number of degrees before TDC, both the intake and exhaust valves will be closed. Not crucial for setting the timing, but helpful for general understanding of how the engine works and why timing is set the way it is.)
Use your wrench or sprocket to hand crank the engine clockwise so that the number one piston is at the top of its compression stroke. Make sure the correct timing mark is lined up with the seam in the crankcase. If you turn too far clockwise, rotate it about 30 degrees back (counterclockwise) before moving forward again to find the correct position. Go more slowly next time!
Take off the distributor cap and take a peek inside. Identify the rotor and look for a small notch inscribed on the inside wall of the distributor. This is where the rotor should be aligned when the number one piston is in firing position, but if your engine's ever been disassembled before, this might not be the case. So take the time to properly align it by loosening the distributor drive clamp bolt.
Next, turn your ignition on, but don't start the car. Switch it on as if you were sitting in a parking lot listening to the radio. Don't crank it. If the engine cranks, you'll have to switch it off, get back under the hood, and start over from the beginning. The goal is to simply provide battery power so the test light will work.
Hook up your test light. Clip it to the distributor wire, make sure it has a good ground, and touch the positive terminal to the ignition point. If the light illuminates, you've done it right.
Now, gently turn the distributor back (clockwise) until the light goes out. Then turn it forward (counterclockwise) until the light comes on. Don't go past the point it comes on and call it good -- you want to identify the closest spot possible to when the test light actually illuminates. Do it again if you're not sure. Then tighten the distributor back into place. Remember, this is just a starting point -- you'll also need to have your engine dynamically timed for optimal performance or fuel economy.
If your engine is new, you'll probably want to check and reset the timing after your engine's break-in period is complete. The heating and cooling down of the metal parts will affect the timing (which is totally normal and not a cause for concern). And if your engine it isn't new, it might be a good idea to warm it up before you set the timing (if possible, and assuming it's running) for the same reasons. Be careful lifting the hood and poking around a hot engine bay, though!
You can ensure the timing is set properly by hand-cranking the engine counterclockwise a quarter turn, and then, returning it very slowly clockwise. If the engine is timed correctly, the test light will flash as the timing marks line up. If so, congratulations. If not...well, start over. At least it wasn't that hard.


