How Brake Relining Works

cars brake system with calipher and brake pad highlighted.
The brake pads are housed in a car's brake system.
iStockphoto.com/Brian Sullivan

­Whoa -- there's a reason we're supposed to look both ways before we cross the street. That pedestrian should not have stepped off the curb. Clearly, she doesn't see you. So you hit the brakes, and she jumps back. Problem solved -- except that high squealing sound doesn't seem to be coming from the pedestrian. It's coming from your car.

It sounds as though you might need to reline your brakes. Not to worry; brake relining is actually one of the most common kinds of brake maintenance. It's a pretty simple procedure.

Advertisement

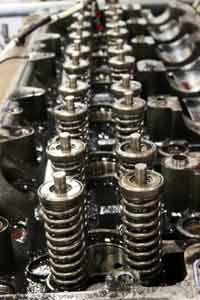
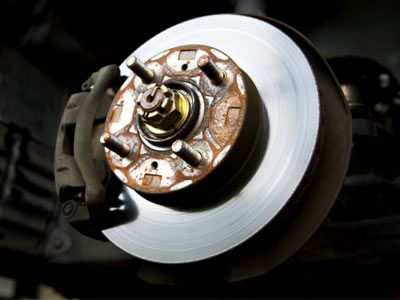
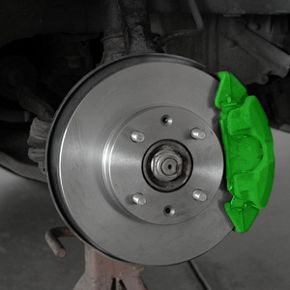
­All brakes work by introducing friction to the forward motion of your car's wheels. The friction makes it harder and harder for the wheels to go forward, which means -- guess what? -- they stop. In physics terms, this means your brake pads are turning the car's kinetic energy into heat energy. Disc brakes do this by means of a friction pad (a.k.a. the brake shoe or brake line) that presses into contact with a rotor (the disc).

­After a while, all that friction causes erosion. Brake relining just means replacing the friction pads. It's a normal part of driving, and it doesn't necessarily mean your car has a huge problem.

­In this article, we'll take a look at how to take out the old brake lines and put in the new ones. But first, how do you prepare for this procedure? And which tools will you need? Read on -- and if those brakes are really loud, maybe it's time to walk to the auto shop.

Advertisement

Brake Relining Preparation

­So you've determined that noise is indeed coming from the front brakes, where most late-model cars have their disc brakes.

Before you take your wheels apart, peek into the inspection opening in the brake caliper. Can you see the line of the friction material? If there's less than 1/4 inch of friction material, it's about time to replace the brake shoes. If there's less than 1/8 inch, you have no time to waste -- the lack of friction material could be dangerous. And it could be causing damage to the brake rotors, which can be more costly to fix.

Advertisement

­If there is some damage to the brake rotors, you might want to have a mechanic smooth out (or "turn") any deep gouges in the discs. That process basically involves sanding away the scars to create a new, smooth surface. But if you've already done that, the discs might be too thin to keep using. That probably means it's time to replace them [source: Buckman].

Check your car's owners manual to find the minimum thickness for your brake rotors. Too-thin rotors are less effective at slowing you down -- and replacements probably won't break the bank.

You might also want to be prepared for the possibility of replacing your brake calipers. They're a hydraulic system, so they can develop leaks and corrosion under normal use. Since you'll be disassembling the brakes anyway, think about springing for replacement calipers.

Checking all these other parts may seem like overkill, but remember -- anything that adds unnecessary friction to your ride is reducing your fuel efficiency. And it might be compromising your safety as well.

­Before you get started, take a look at the list of tools and parts on the next page. As a refresher course, you might also want to take a look at the parts and structure of a disc brake.

Advertisement

Tools for Brake Relining

Brake relining, as we mentioned, is a pretty simple procedure, and you don't need anything too fancy to do it right. Here are the tools you should have on hand before you start:

  • A secure way to jack your car up. This means two jack stands -- not hydraulic jacks -- or a floor jack. You need something strong enough to hold your car safely for the duration of your work, and you're going to be working for a couple of hours.
  • A tire iron or spinner
  • Brake pad grease (a.k.a. caliper slide grease)
  • The all-important new brake pads

You may also want to have:

Advertisement

  • A vise grip, channel lock, or C clamp
  • Heavy-duty gloves
  • A dust mask
  • A micrometer

And, depending on where you're working and how accident-prone you are, you might also want to have a few disposable plastic cups and a Sharpie®. As you take the brakes apart, you can use these to contain, separate and label the bolts and other fasteners for the various brake components.

Finally, if the brake pads have worn down quite a bit (to 1/8 inch or less), you should inspect the discs. Signs of trouble include:

  • an uneven surface
  • a dull surface
  • grooves or gouges in the metal
  • variations in thickness (even tiny ones can be problems; check using the micrometer)
  • warping
  • cracks
  • a diameter that meets or exceeds the maximum for that rotor (which should be stamped on the disc itself)
  • differences in thickness between the rotors on the two front wheels [source: Memmer]

If you spot any of these signs, it's time to replace the discs. You'll be able to find replacement brake rotors at your auto store.

­On the next page, we'll look at the first big step: taking out the old brake pads.

Advertisement

Removing Old Brake Lines

First things first: Park the car and jack up the front. Remember to set the parking break. And if you've been driving for a while (say, to the auto parts store), remember that engine components may be hot enough to burn you.

Now, using your tire iron or spinner, take off one of the front wheels. Take off the brake caliper. You'll probably need to remove bolts to do this. Remember to keep bolts in clearly designated areas, so you know which bolts go with which parts. Slide the caliper off the rotor.

Advertisement

The brake pads are on the inside of the caliper. Depending on the car, you'll see bolts, springs or clips attaching the pads to the caliper. Undo those fasteners.

You'll notice that the new brake pads are thicker than the old ones. That means you'll have to adjust the piston to accommodate the new thickness. Open the piston. When it's fully open, it will be closer to the center of the car than to the wheel. You might be able to open it with your bare hands, but if it puts up a fight, use your vise grip or channel lock to push it back. You can also use a C clamp to get it open. Get the lips of the clamp inside the piston, and then open the clamp. If you go this route, though, make sure to protect the surface of the piston somehow. And be aware that a too-tight piston may signal caliper problems [source: Memmer].

Opening the piston forces fluid back up into the hydraulic system. Professional mechanics take the precaution of lowering fluid in the piston's reservoir before raising the car on the jacks. If you skip this step, just be aware that the reservoir might overflow.

Now it's time to replace the rotor, if you're doing that.

Before you put on the new brake pads, break out the brake pad grease. Put it on the side of the new brake pads that will face away from the rotor.

­You're more than halfway done. To find out how to put on the new pads and road-test the car, read on.

Advertisement

Installing New Brake Lines

Fit the new brake pads onto the caliper. Reattach all the clips and bolts and anchors, making them as uniform as possible. Variations in tightness can lead to rotor damage down the line.

Next, slide the caliper back onto the rotor, and reattach it.

Advertisement

­Now, repeat the whole process for the other front brake. And -- very important -- put the wheels back on.

Now let's get this puppy on the road. Professionals refer to this process as "burnishing" the new brake pads [see sidebar]. The heat and friction of driving are what get the new pads working their best. However, that means that you want to avoid excessive heat before the pads are ready to handle it.

  • If you drained any brake fluid from the piston reservoirs, replace it. Some mechanics recommend changing your brake fluid as part of this process, but you're not going to ruin everything if you reuse the old brake fluid.
  • Again, don't overheat the brakes. Don't brake suddenly, and try not to bring the car to a complete stop until you're done burnishing. And when you're done, don't drive the car again right away. Let it cool.
  • Accelerate gradually to about 45 mph. Then brake gradually to about 5 mph. Drive at that speed for about a minute. Then, accelerate gradually to 45 mph again, and brake gradually again. Repeat the process at least ten times.
  • Try to pick a relatively unused road, and remember to leave yourself more stopping distance than you think you'll need. You're testing the brakes because of the possibility, however remote, that they might not work.
  • As you drive, listen. You may hear some squealing as the brakes adjust to the new pads. It's probably nothing to worry about, but if it persists, you may want to take a closer look at your work. Make sure all the clips and bolts are attached with uniform tightness.

­

For more braking information, visit the links on the next page.

Advertisement

Lots More Information

Related HowStuffWorks Articles

More Great Links

Sources

  • "Brake Noise Diagnosis." Wingate Brake and Steering Centre. http://www.winbrake.com/trainingmaterials/BrakeNoiseDiagnosis.html (Accessed November 3, 2008)
  • Buckman, Leonard C. "Commercial Vehicle Braking Systems." http://books.google.com/books?id=CEnQqBTYsr0C&pg=PA79&lpg=PA79&dq=disc+brake+reline&source=web&ots=izWSSlI3_n&sig=2hqm5Kgw8r44HO16i9h37p01wv8&hl=en&sa=X&oi=book_result&resnum=9&ct=result (Accessed November 3, 2008)
  • "How can I tell if a rotor or drum really needs to be replaced?" Yahoo! Autos. http://autos.yahoo.com/maintain/repairqa/brakes/ques008_4.html (Accessed November 3, 2008)
  • "Is it always necessary to resurface the rotors and drums when the brakes are relined or to rebuild or replace the disc brake calipers or drum wheel cylinders?" Yahoo! Autos. http://autos.yahoo.com/maintain/repairqa/brakes/ques007_3.html (Accessed November 3, 2008)
  • Memmer, Scott. "How to Change Your Brake Pads." Edmunds.com How-To Articles. http://www.edmunds.com/ownership/howto/articles/43787/article.html (Accessed November 1, 2008)
  • "What parts are generally replaced during a brake job, and why?" Yahoo! Autos. http://autos.yahoo.com/maintain/repairqa/brakes/ques006_4.html (Accessed November 3, 2008)

­

Advertisement

Loading...