How to Change a Cabin Air Filter

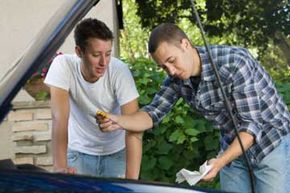
unappealing candy
Tempted? We didn't think so. Find out the best way to stay out of the car shop and change your own cabin air filter.
©iStockphoto.com/philpell

Modern cars often feature cabin air filters. These useful automotive parts filter any air that's going to blow out the vents, so particles like dust, pollen and pollutants don't make it into the passenger compartment (at least when the windows are closed). Not to be confused with the air filters that keep contaminants out of the engine, cabin air filters protect your interior and are great for when you're driving during the height of allergy season or on a traffic-congested highway.

The first step to changing your car's cabin air filter is finding where it's located. The filter is readily accessible in most vehicles that sport them, but the location varies widely from model to model. In some cars, the cabin air filters are located under the hood, while in others they're under the dashboard or behind the glove compartment. The owner's instruction manual will usually tell you where it is, or you can ask a dealer or other automotive professional to point it out for you.

Advertisement

Once you know where the filter is located, you're ready to go. An auto parts store can steer you toward the correct replacement part for your vehicle's particular make and model. It usually only takes a couple of minutes to perform this little bit of automotive maintenance, so doing it yourself can save you money and spare you the hassle of having to kill time in a mechanic's drab waiting room, languishing next to a dusty gumball dispenser filled with petrified remains of candies of unidentifiable origins.

On the next page, we'll gear up and talk about some of the tools you may need to change your car's cabin air filter.


Advertisement

Tools Needed to Change a Cabin Air Filter

car maintenance
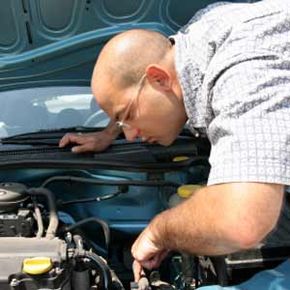
Lots of routine car maintenance is well within the capabilities of even automotive amateurs.
©iStockphoto.com/YinYang

If your Saturday to-do list includes changing your car's cabin air filter, you'll want to make sure you don't find yourself halfway through the job and short a tool -- chances are that would mean repositioning the old setup, heading to the store, buying the necessary gizmo, driving back home, and starting all over again from scratch -- a surefire way to waste valuable weekend time!

Fortunately, changing the cabin air filter of most vehicles probably doesn't require any tools that aren't already lying around the house. The first time you set out to perform this particular project, it's usually a good idea to have a spare rag, a vacuum cleaner and a set of screwdrivers on hand. The rag and the vacuum are used to wipe up the housing compartment and suck clear the ventilation system to prepare everything for the new filter. The screwdrivers are, predictably, there to unscrew any hardware you might encounter. (Some cabin air filters simply clip into place, while others are installed more rigorously.)

Advertisement

In regard to safety, it's also a good idea to pop on some goggles and a breathing mask. The goggles will protect your eyes if anything zings out unexpectedly, and the breathing mask will keep you from inhaling dust or other junk that gets shaken loose during the replacement process. After all, you don't want to go to the trouble of protecting yourself from particles only to suck in a whole lungful right at the last second.

We'll take a more in-depth look at how to remove the old cabin air filter on the next page.

Advertisement

Removing Old Cabin Air Filters

cabin air filter
It can take a little searching to find your car's cabin air filter for the first time if you don't have your owner's manual handy.
©iStockphoto.com/vladacanon

As we've already discussed, cabin air filters can be hiding out in a number of different nooks and crannies depending on what type of car we're talking about. Some lurk under the hood while others are housed behind the glove compartment. It's also possible yours is located under the dashboard. Once you've spotted where the filter's housing unit is, simply open it up and remove the old filter to make way for the new one. This can involve unclipping or unscrewing it -- and it typically doesn't take long to figure out which task you'll need to do. Some unlucky car owners may need to remove the glove box to get the job done, but in most cases, that's not necessary.

Once you've pulled the filter element free, you'll want to judge whether it needs replacing or whether it'll be good to go for a few more miles. If it's gray and grimy, that's a strong indication you should splurge on a new one (and it's hardly a splurge -- most cost less than $25). Sometimes, however, air filters contain activated charcoal that turns them gray before their time, so make sure there's also plenty of telltale dust before you replace it. New cabin air filters are usually nice and white -- at least in the beginning.

Advertisement

If you do opt to replace your filter, it's a simple process. On the next page we'll dive into how you go about attaching your fresh cabin air filter.

Attaching New Cabin Air Filters

commute
Does this look like your drive home? If so, you may want to swap out your old cabin air filter for a fresh one.
©iStockphoto.com/milehightravler

As you've probably guessed, attaching a new cabin filter is pretty much just the reverse of the steps you used to take the old one out. But before you swap in the new one, take a few minutes to clean up the housing compartment and air intake duct. This will help sweeten the air inside your car and set your new cabin air filter on the path to enjoying a nice long life.

Once everything's cleaned up, pop the new cabin air filter into the slot left by the old one. Securely reclip or rescrew anything needed to hold the new filter firmly in place -- you don't want any air to be able to slip by unfiltered.

Advertisement

With that task complete, you can rest assured you'll be breathing purer air, free of allergy-inducing pollen and cough-provoking pollution. This is especially important if you or any of your regular passengers have respiratory issues that make breathing dirty air especially irritating or even dangerous. Typically you'll want to replace your cabin air filter about once a year, or every 12,000 to 15,000 miles (19,312 to 24,140 kilometers), although it doesn't hurt to take it out and shake free the debris from time to time in between replacements. If you live in a traffic-clogged urban center, you might want to change yours more often than if you live in a more rural setting. The harder you force your air filter to work, the faster it'll clog up.

Now that your car has a new air filter, you can breathe easy knowing you are, in fact, breathing easy. On the next page you'll find links to lots more great info about cars, car maintenance and motoring in general.

Advertisement

Lots More Information

Related HowStuffWorks Articles

Sources

  • Allen, Mike. "Saturday Mechanic: Replacing Your Cabin Air Filter." Popular Mechanics. April 2003. (10/27/2009) http://www.popularmechanics.com/how_to_central/automotive/1272511.html
  • "Cabin Air Filter." Do It Yourself. (10/27/2009) http://www.doityourself.com/stry/cabin-air-filter
  • "Changing Automotive Air Filters." Extreme How-To. (10/27/2009) http://www.extremehowto.com/xh/article.asp?article_id=60201
  • Guilfoil, John. "Stuff for Your Car: Replace the cabin air filter." Blast Magazine. June 26, 2009. (10/27/2009) http://blastmagazine.com/the-magazine/culturefashion/2009/06/stuff-for-your-car-replace-the-cabin-air-filter/
  • "How Do I Change My Air Cabin Filter?" 2CarPros.com. (10/27/2009) http://www.2carpros.com/how_to/change_cabin_filter.htm

Advertisement

Loading...