Brake Light Wiring Preparation
Before you dive right into a brake repair job, it will pay to do some brake light wiring preparation. First, find the car's manual and have the brake light wiring diagram handy. All brake work should start with diagnosing the problem. It's very helpful to have a partner working with you because you'll need someone to press the brake pedal while you're otherwise occupied. Your partner is vital for the first step — check to see which brake lights are working and which ones aren't. Have your helper press on the brake pedal, and then watch to find out if just one brake light is out (specifically which one) or if they're all out.
If none of the brake lights are working, check the fuse block. Find the fuse marked "brake lights" and check to make sure the fuse isn't burned out. It's not a bad idea to double-check the fuse operation using a voltage test light or multi-meter. If the fuse is OK, check the bulbs. An easy way to do this is by activating the turn signal. In many cases, the brake light and the turn signal use the same bulb. If the turn signal works, you know the bulb is fine, so the problem lies elsewhere in the brake light wiring.
Advertisement
The next step is to check the sockets. Again, you can use your test light to see if the sockets are getting power. Then, move on to the brake light switch, located near the brake pedal. There will be a power wire and a ground or output wire (consult the wiring diagram). Your test light should show power from the power wire at all times, even without a key in the ignition. The ground/output wire should show power when the pedal is pressed down. Another point to remember is that the switch may be improperly adjusted. The bracket that holds the brake switch in place could keep the brake pedal from making contact with the switch if it has been moved.
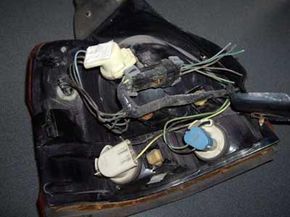
If all else fails, check the diagram and trace the brake light wiring through the entire car. There may be a break in the wire at some point. If the wiring bundle passes through an area that has a rough or sharp edge, the casing surrounding the wire may have been cut causing a short in the circuit. Another possibility is if the wiring has been exposed to wetness, it could have rotted out and then short circuited.
Once you've tracked down the problem, it's time to get down to the business of fixing brakes, or more accurately, fixing the brake light wiring. You'll need the right tools for the job.