How to Remove Window Tint Without Professional Help

Removing window tint requires a lot of patience. Bhakpong / Shutterstock

Removing car window tint might seem like a tricky job, but with the right tools and patience, you can get it done yourself. Whether your tint film is bubbling, fading, or peeling, taking it off properly will prevent damage to your glass and give the car a fresh appearance.

While professional window tint removal is always an option, you can save money by figuring out how to remove window tint yourself, following these simple steps.

Advertisement

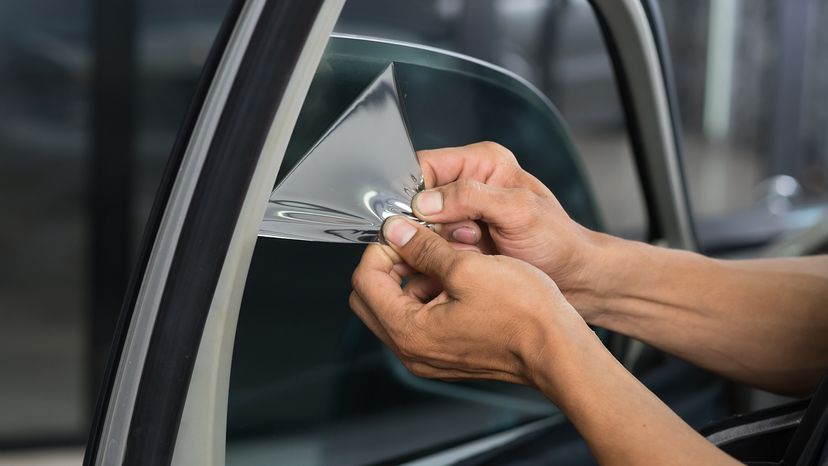
The window tint removal process requires heat, patience and a few basic tools. By using a heat gun or hair dryer, you can soften the adhesive and make it easier to peel off. Here's a step-by-step guide on how to remove window tint safely and effectively.

Step 1: Apply Heat to the Window Tint

Use a hair dryer or heat gun to warm up the tinted window. Hold it a few inches away and move it around to evenly heat the window film, then turn to other side glass and heat it from that side as well. The heat helps loosen the adhesive, making it easier to peel off in large sections.

Wetting the tint prior to heating can also help distribute the heat evenly and loosen it from the glass. If you have access to a fabric steamer, this device can effectively wet the tint film while heating it at the same time.

Advertisement

Step 2: Peel Off the Tint Film

Once the window film tint is warm, use a razor blade to lift one corner of the tint. Keep the sharp blade at a narrow angle just beyond parallel so you are not cutting into the glass directly.

As long as you guide the razor carefully you are unlikely to leave behind any scratch marks because the underlying automotive glass is much harder than steel.

Advertisement

Slowly peel back the film, applying more heat as needed. Be careful around the rear window to avoid damaging any defroster lines.

Step 3: Remove Window Tint Glue

After peeling off the tint film, you'll likely have some remaining adhesive left on the glass. Fill a spray bottle with soapy water or an adhesive remover and spray it generously over the sticky areas. Let it sit for a few minutes to break down the glue.

If this alone doesn't loosen up the glue residue, you may also want to apply an isopropyl alcohol solution to dissolve the adhesive.

Advertisement

Step 4: Scrape Off the Remaining Adhesive

Use a razor blade, scrub brush or plastic scraper to gently remove window tint glue. If using a razor, you will want to keep it at a narrow angle as you did in the second step. Work slowly to avoid scratching the glass.

For stubborn spots, reapply the adhesive remover and let it soak before scraping again.

Advertisement

Step 5: Clean the Window Thoroughly

Once all the old window tint and glue are removed, wipe down the glass surface with a clean cloth and glass cleaner. This will remove any leftover residue and leave your window crystal clear.

If needed, repeat the process on other windows until all tint is removed. Your car is now ready to head to the detailer for a new window tint job (if that's what you're looking for).

Advertisement

We created this article in conjunction with AI technology, then made sure it was fact-checked and edited by a HowStuffWorks editor.

Advertisement

Advertisement

Loading...