How to Dynamically Time an Engine

Man working on engine
Can you improve your car's performance by dynamically timing your engine? Check out these car engine pictures!
Adam Hester/Workbook Stock/Getty Images

"Gentlemen, start your engines ..."

This phrase was once, and occasionally is still, a civilized beginning to any cut-throat motor race event. Without thinking, the author of that over-used statement distilled the vast complexity involved with firing a motor into four simple words.

Advertisement

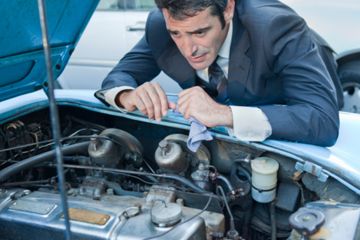
The idea behind timing a car correctly is to fire a spark in the combustion cylinder at just the right time so that the ensuing explosion pushes the piston down with the maximum efficiency given the engine's load. If the fuel in a combustion chamber is sparked too soon or too late, there can be excessive vibration, even engine damage. Good timing improves engine power, life and fuel economy.

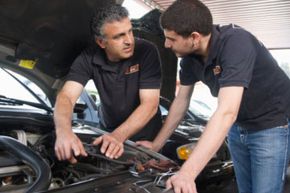
Timing comes in two different flavors: static and dynamic. Static timing is to dynamic timing as science is to art -- and dynamic tuning is something of a dying art, though there are still a large number of supporters today. The reason for this is electronics. While modern cars still require static timing after something like a timing chain replacement, the car's dynamic timing is handled by a host of computer modules. Essentially, if you own a car without a distributor, you'll be reading this article for theory rather than practice, though there are some aftermarket systems that allow for dynamic timing through the engine controller.

Dynamic timing sets the ignition and base timing of an engine, allowing an engine to work at peak efficiency. However, the changes are made with the engine running. This may sound a little daunting, but with the right tools and a little knowledge, it's possible for most people with a basic grasp of engines to do.

Read on and find out more about the art of dynamic timing and how it's done.

Timing is Everything

The essence of ignition timing, whether it's static or dynamic, is to ensure the spark igniting the fuel vapors happens at the correct time. "Correct," however, is a shifting target.

Imagine an engine piston rushing up its bore during the compression stroke. Fuel is injected into the bore and gets compressed as the piston rises. At or near the top of the stroke, the spark plug fires and the fuel ignites, pushing the piston down. It's a simple process, but one that needs to account for how long it takes for all the fuel to ignite in relation to when the piston will reach top dead center -- the point where the piston and cylinder head is smallest and exploding fuel will have the most power and most complete burn.

Advertisement

With the above factors in play, the ignition must be timed so the spark begins the fuel burn sometime before top dead center, or BTDC in engine parlance. This is measured in degrees of rotation. Most engines set ignition timing somewhere between zero and 20 degrees before top dead center. This is called base timing. When set, the ignition system and engine are timed so the fuel in a cylinder is at its peak burn just as the piston compresses the fuel vapors into the smallest amount of space.

Most cars will run fine with timing a few degrees off from ideal. But further refinements are needed to reach a point where the engine is running at peak performance and has the fewest exhaust emissions.

Before delving into any type of ignition timing, check the engine to see if all of the systems are working correctly. If other systems related to the engine and ignition are not working right, then it's likely that the timing will need to be reset once other problems are repaired. It's best to set timing on a car in top condition, if possible.

Make sure to check:

  • Spark plugs (condition and age)
  • Spark plug wires or coils (condition and age)
  • Distributor system (correct function and condition)
  • Fuel injectors or carburetor
  • Fuel pump and lines
  • Battery condition and state of charge
  • Overall engine condition

With the list checked and the car off, it's time start timing the ignition system ... almost. There is some information to gather before you get your hands dirty. We'll approach this in the next section.

Finding Cylinder No. 1

Father and son working on engine
Make sure you know exactly where cylinder No. 1 is.
John Eder/The Image Bank/Getty Images

Before timing the ignition, you need numbers. These numbers can be acquired through aftermarket repair manuals, manufacturer repair manuals, and reputable Internet sources, and from the car's emission labels. Before even picking up a tool, know what RPM the engine is timed at, the degrees before top dead center range and which engine cylinder is cylinder No. 1.

The vast majority of engines time the engine off cylinder No. 1. If a manual is short on information about the key cylinder, follow these general rules:

Advertisement

  • Four- or 6-cylinder engines. On most in-line 4- and 6-cylinder engines, cylinder No. 1 is the most forward cylinder.
  • V-6 or V-8 engines. Most V-type engines use the left front cylinder at cylinder No. 1.
  • Transverse engines. Most front-wheel drive vehicles with transverse engines use the far right cylinder as cylinder No. 1.

There are exceptions to this rule. Ford V-6 and V-8 engines, for example, use the far right cylinder as cylinder No. 1. In-line 6-cylinder engines produced by Jaguar before 1988 are timed from cylinder No. 6. It pays to do your research first.

You now have your numbers in hand, you know where cylinder No. 1 is and you know what RPM the engine should run at during timing. Here are a few more things to check, and then check again:

  • The engine should be at normal operating temperature. This means the radiator hose leading from the engine to the radiator should be hot and pressurized.
  • If the engine is equipped with a vacuum-advanced distributor, remove all vacuum hoses and plug the one into the distributor.
  • If the timing advance and retard control to the distributor is computer-controlled, you'll need to disconnect the "set timing" connector wire, ground a diagnostic terminal or disconnect a control connector. The timing instructions will give you the specifics.

Don't Start Your Engines Just Yet

You have your numbers in hand. Your tools are within reach. Now, it's time to start. Or at least start the timing light, one of the most critical tools in your arsenal.

A timing light is simply a strobe light timed to flash on and off as the spark plug at cylinder No. 1 sparks on and off. This light is aimed at specific timing marks on the engine, and the two coordinate to time the ignition system to engine rotation as the car is running. In short, this is dynamic timing.

Advertisement

The timing light has three leads: one for battery positive, one for battery negative and one that clamps on to the cylinder No. 1 spark wire. Hook the leads up, and check to see if the light works.

Find the timing marks on the engine. Most are on the crankshaft pulley and block, but some systems have them in other locations. There will be two marks. Make sure these are visible by either cleaning them, or marking them with bright paint or chalk.

Now, refer to your timing specifications. Let's assume your car is a 1969 Ford Mustang with an automatic transmission and a 429 engine. The factory manual stated ideal timing was 6 degrees BTDC measured with engine idling at 600 RPM in gear.

With the vacuum lines to distributor disconnected, the marks chalked in and the timing light hooked in correctly, it's now time to start the engine.

Aim the timing light at the mark and press the trigger. The marks should look like they're standing still. If the two lines are lined up, your engine is timed correctly and there's no further work. If they're not, it's time to adjust the timing. This is accomplished by adjusting the distributor.

Loosen the distributor hold-down clamp enough to allow the distributor to rotate on its central shaft. Rotate the distributor slightly, only a few degrees one way or the other. Check your marks with the light. If they're farther apart, rotate the distributor a few degrees in the opposite direction from the way you first turned it. If the marks were closer together, keep rotating in the original direction.

Once the timing is correct, tighten the hold-down, and then recheck the marks. Sometimes, tightening the distributor can change the timing.

While the timing light is connected, reconnect your vacuum hose to the distributor, and check to see that the vacuum advance is working correctly. If it's working, you can see the marks shift apart as the RPM is increased or move closer together as it decreases.

Once you understand timing's basic techniques, the process is fairly simple and straightforward. In fact, properly timing and engine can extend its useful life, make it more efficient and better-performing.

Lots More Information

Related Articles

  • Bengston, Les. "Ignition Timing." CustomPistols.com. (April 18, 2012) http://www.custompistols.com/cars/articles/ignition_timing.htm
  • Century Performance Center. "Your Engine's Ignition System and Timing Settings." (April 19, 2012) http://www.centuryperformance.com/ignition-and-timing-settings-spg-219.html
  • Chamberlin, Ken. Chrysler Master Technician. Personal interview. (April 17, 2012)
  • Edgar, Julian. "Getting the Ignition Timing Right." Auto Speed. Issue 449, September 2007. (April 16, 2012) http://autospeed.com/cms/title_Getting-the-Ignition-Timing-Right/A_109132/article.html
  • Halderman, James D., and Chase D. Mitchell, Jr. "Automotive Engines: Theory and Servicing." Pearson Education, Inc. 2005.
  • Messina, Stephen. Chrysler Master Technician. Personal interview. (April 17, 2012)
  • Pickerill, Ken. "Automotive Engine Performance." Thomson Delmar Learning. 2006. (April 16, 2012)