How to Test Brake Line Fittings

Brake line testing is simple and straightforward -- only a few hand tools are necessary.
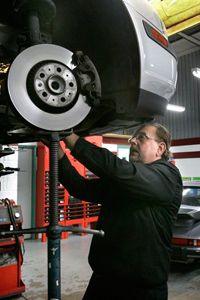
Image Gallery: Brakes Brake line testing is simple and straightforward -- only a few hand tools are necessary. See more pictures of brakes.
iStockphoto/Thinkstock

Brakes are one of the most critical systems on a car. Connecting the parts are line fittings tying hydraulic brake lines to the mechanisms changing pedal force to braking force. While only a few in type, and of very basic construction, these fittings should be checked and tested as a routine part of annual car maintenance. Luckily, testing is simple and straightforward and only a few hand tools are needed.

In today's cars, with traction control, electronic stability programs, anti-lock brake systems, and a host of other new brake technology, fittings play an even more critical role. Most of the advanced brake additions and systems work from the base brake system and are tied in through more fittings. The base brake system is the one all cars have used since hydraulic brakes were introduced in the 1920 Duesenberg, and became part of Chrysler's mass-produced cars in 1924.

Advertisement

In essence the hydraulic base brake system uses hydraulic fluid to add mechanical advantage to the brake pedal. The fluid, existing in an enclosed circuit system, exerts force on hydraulic pistons, which in turn exert force on brake pads or shoes. The force is supplemented by a variety of power systems ranging from vacuum to hydraulic.

Newer introductions like ABS, traction control, even some advance cruise control and anti-roll-over systems, refine and control the base brake system to do their programmed bidding. But it's still just a base brake system doing all the work and it pays to pay attention to its needs -- including the fittings.

Ahead, we'll take a look at the tools used on the fittings, how to remove them, how to tell if they're corroded and how to test them to see if they're sound.
Tools for Testing Brake Line Fittings

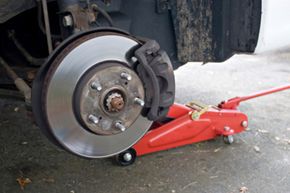
Fittings allow steel and flexible brake lines to link to a mechanical device. Steel brake lines are flared at the ends, and these flares are drawn into, and sit precisely within, the fitting. Flexible hoses, like those running from the steel frame lines to the calipers, have similar fittings.

Fittings are considered sound if no fluid is leaking from them. The test to determine their relative soundness is time consuming, but very simple.

Advertisement

You will need a:

  • Good service manual or owner's manual showing the location of the major portion of the base brake system from the master cylinder, to vales, to calipers and wheel cylinders
  • Flashlight
  • Creeper or piece of old carpet
  • Good friend, a long stick or long pry bar
  • Pair of safety glasses

Brake systems work through pressure, so they must be tested under the same conditions they work under, and pumping the system up by pumping and holding the brake pedal down is a good way to simulate a stop.

Once all the major components are located have your friend get in the car and pump the brake pedal several times with the car off, and hold the pedal down on the last pump. If no friend is available, pump the system up yourself and on the last pump push the pedal down and hold it in place with the stick or pry bar, wedged against the front of the driver's seat.

Beginning under the hood, check all the fittings beginning at the master cylinder and working your way down and towards the rear of the car. Calipers have a special fitting called a banjo fitting that seals itself with two copper washers, one on each side. Make sure you check around the copper washers for leakage, and replace them with new ones if needed.

Wear your safety glasses. Brake fluid is corrosive, and your system is now under pressure. Getting a squirt of high-pressure brake fluid in the eye can lead to a trip to the emergency room.

Check all sides of each fitting. Leaks should be readily apparent. Keep your ears opens as well for hissing noises, or the sound of fluid hitting another part of the car, like the frame or body panels. The creeper and carpet will ease any movement under the car so you can reach where the lines and hoses attach to the calipers and wheel cylinders.

Usually pumping the system with the car off is enough to look for most leaks. However, if you still suspect a leak then start the car and pump and hold the brakes adding the brake booster to the pressure potential.

How to Remove Brake Line Fittings

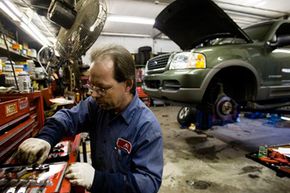
Al Van Sant, a mechanic at East Falls Gulf Service Station, gathers tools for brake work on an SUV in Philadelphia.
AP Photo/Matt Rourke

If you find your brake line is leaking it must be replaced. Any hydraulic system only works well as a closed system. Air inside the system, or fluid leaking out, can compromise its potential and lead to soft brakes or no brakes at all.

Removing a brake line is as straight forward as removing a bolt from a nut. Because it's simple, however, doesn't make it necessarily easy. Brake fittings are subject to damage by road debris and corrosion from salt, water and galvanic reactions. Most fittings are steel, and while anodized to reduce rust and corrosion, they can (and do) corrode.

Advertisement

The tools you will need are:

  • Rust penetrant and lubricant
  • Flare nut wrench
  • Ratchet and socket
  • Open-end wrench

Soak the fitting in question in rust penetrant and wait anywhere from 10 minutes to a full day for the chemicals to work. If the fitting looks particularly bad keep dosing it with generous amounts.

The best tool for removing the fitting is a flare nut wrench. This is an open-ended wrench with five sides for gripping rather than three. Slip the appropriate-sized wrench over the line and slide it down to the nut. Then carefully apply pressure in a counter-clockwise direction.

Sometimes a lot of force is needed to break a fitting free. Be prepared to use a pipe or wrench extender, if possible. Sometimes the nut needs to be worked back and forth, or tightened a little and then loosened before it gives. Sometimes it's just not possible to budge it at all.

If you can't move the fitting in the car, you may have to cut the brake line close to the fitting, remove the component, and attack the fitting out of the car with an open-end wrench, or a deep socket and ratchet. The line will have to be replaced, but this is often cheaper than a new caliper or valve. If a fitting is corroded it's likely the line wasn't doing well either.

Once the component is out of the car the fitting can be heated to help loosen it. This, however, is a possibly dangerous strategy. Brake fluid has a high boiling point, but when reached it can change to a super-heated steam without warning and shoot out of any available crack, pinhole or outlet. Use extreme caution when using heat and take all available safety precautions.

Sometimes it's not possible to salvage the fitting and component and the better part of prudence is to replace the component, fitting and line. Keep reading to find out when this is necessary.

Is the brake line fitting stripped or corroded?

Mechanic Ed Wuerth works on a Volvo at his shop, Wuerth Automotive, in Brownstown Township, Mich.
AP Photo/Carlos Osorio

Brake line fittings, from line connectors to bleeder screws, can easily become corroded. Removing them is often a Herculean endeavor and leads to the thread stripping, or rounding of the fitting nut.

Corrosion is the changing of the base metal -- mostly steel -- into another substance like rust, or the white dust of galvanic corrosion. This change results in a chemical welding of metal to metal, as well as a structural weakening of the base material. Corrosion can be external as well as internal to the fitting and on the threads. If no corrosion is apparent but you suspect the fitting try to fit a properly-sized wrench over the nut. If it doesn't fit correctly then there is internal corrosion warping the fitting.

Advertisement

Once the fitting is out carefully examine the threads. They should be clean and sharp on both the male and female portions. Slight crushing of the threads can be rectified by carefully using a re-threading set with the proper size tool. In extreme cases, if the threads are squashed flat or worn down from corrosion, either the fitting or component needs replacing.

Also examine the nut surfaces. They should be flat and the corners should be well defined. If the corners are rounded from the force needed to remove the fitting then replace it. It may be easy to seat and tighten now, but if you need to replace it at a later time, a rounded nut can cause huge headaches that could be resolved with a new fitting.

The rule of thumb is if a fitting works (if it's not leaking), then let it be. These components are temperamental, as well as being a critical part of the brake system. That being said, paying attention to them, as well as the rest of the system, could stave off future problems and make for a safer car.

For more information about brakes and other related topics, follow the links on the next page.

Lots More Information

Related Articles

  • Chamberlin, Kenneth. Chrysler Master Technician. Personal Interview. Conducted on Oct. 17, 2010.
  • Erjavec, Jack. "TechOne: Automotive Brakes" Delmar Learning. 2004.
  • Landry, Greg. Chrysler Certified Brake Technician. Personal Interview. Conducted on Oct. 19, 2010.
  • Messina, Stephen. Chrysler and ASE Certified Technician. Personal Interview. Conducted on Oct. 21, 2010.