How Brake Bleeding Works

Close-up of mechanic working on auto brakes.
iStockphoto.com/Lisa F. Young

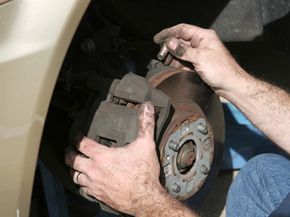
If the term "brake bleeding" conjures up images of a clean, contented person stepping on a brake pedal while another grumpy, dirty, frustrated person yells, "Push down!" from under the car, your image would be correct. Brake bleeding is a general repair job that many people would not enjoy, but it is something that must be done throughout the lifespan of an automobile.

Most brakes should be bled every two or three years to keep your brake system at optimum performance. [source: Allen] Small amounts of air can become trapped in the brake line, creating a spongy feeling when you step on the pedal. If large amounts of air enter the brake line, your vehicle can suffer a complete braking failure.

Advertisement

So how does air get in there? Air can sneak into your brake system during certain types of servicing or if there is a leak. Air can also enter the line for less obvious reasons like worn pads (or an impatient driver who constantly slams on the brakes).

When you bleed brakes, you are removing the air from the line. This helps ensure that your brakes are in top condition, and that you won't drive off the edge of a cliff like some tragic characters do in the movies. There are three methods of bleeding brakes:

  • Vacuum pumping
  • Pressure pumping
  • Pump and hold

If you find that your master cylinder is low on fluid, you should investigate the problem. The entire braking system is a closed system, meaning no fluid should ever escape. If you are low, finding and fixing the leak should be your first order of business.

In this article, we'll explore each method. We'll start with the supplies needed to get your favorite car back in shape. Start your engines! Then pull into the garage, and shut them off again.­

Supplies for Bleeding Brakes

Have all your supplies gathered and within reach before you start bleeding your brakes. The job is trying enough without having to stop what you're doing to find a tool. Use this checklist to get you started: [source: Comeskey]

A 10 mm box wrench for disc brakes and an 8mm box wrench for drum brakes. Double-check to make sure these sizes fit your specific bleeder screws.

Advertisement

You'll need at least one can of brake fluid if you are just bleeding the lines, up to three for a full replacement. Consider using a fluid that is a different color than what is already in the brake line. This can make it easier to see when the old fluid has been flushed from the system, and you are pulling in the new fluid. [source: Dempsey]

  • Turkey baster (It's useful if you want to clear the master cylinder reservoir of old fluid and any debris.)
  • Clear plastic tubing
  • One can of brake cleaner
  • A car lift or four jack stands
  • A disposable bottle
  • Brake cleaner (for cleaning parts before reseating them)

Depending on which method you decide to use to bleed your brakes, you will need one of the following:

  • An attentive assistant (two-person method)
  • Vacuum brake bleeder (one-person method)
  • Pressure brake bleeder (one-person method)
  • One-way bleeder screws (one-person method)

As they say, measure twice and cut once. The same applies to bleeding brakes, so read on to find out how to properly prepare for the task.

Preparations for Bleeding Brakes

Now that you've got your supplies, you can begin to prepare for the actual bleed. Conveniently, no matter which method you use, the same basic supplies apply. The day before you plan to bleed the brakes, consider applying penetrating oil to the bleeder valves to loosen them. These valves are hollow so you don't want to apply too much force — and don't tap them with a hammer, as this could cause damage. Gather a bunch of old rags to have on hand. Brake fluid ruins paint the moment it makes contact. To prevent damage, use the rags to clean any (inevitable) spills or drips right when they occur.

On the day of the bleed, place the vehicle on jack stands or a lift, and ensure the vehicle is secure. Remove all four wheels, then tighten one lug nut back against each rotor and place a square of lumber under the brake pedal to keep it from falling to the floor when you start bleeding the brakes. [source: Comeskey, Allen]

Advertisement

Refill the reservoir with fresh fluid before starting, and be sure to refill the reservoir throughout the bleeding process, keeping the fluid level above the seam at all times. Replace the reservoir cover each time you top off the reservoir. [source: Allen]

Connect the plastic tubing from the first bleeder valve to a disposable bottle on the floor. Make sure your tubing is long enough to reach the bottle without having to worry about it coming out of the bottle while you work. If this is your first time bleeding brakes, add a couple of inches of new fluid to the bottle, and keep the end of the tubing in the fluid to prevent air from sucking back up into the system.

Bleeding Brakes With One Person

If you want to bleed your brakes alone, there are a couple of products designed to make your job a lot easier. These items can be purchased at the auto supply store or obtained online.

Vacuum pumps work by sucking the brake fluid out of the system through the bleeders. There can be a problem, however, if the pump is not securely attached to the bleeder threads. Air can sneak into the line if the bleeders aren't clean. Before attaching the pump, clean the bleeder and the bleeder hole with brake cleaner. Not all vacuum pumps are the same. Read your owner's manual to learn how to use the pump properly.

Advertisement

Pressure pumps work by forcing the brake fluid out through the bleeder valves. The fluid-filled pump attaches to the master cylinder and forces pressure through the system as you open one valve at a time. Because the pump holds fluid, you don't have to refill the fluid reservoir constantly. [source: Dempsey]

One-way check valve bleeder screws allow the air and fluid to come out while snapping closed before air can get back in. Attach the check valve to the bleeder on one end, and attach your clear tubing to the other end. Apply pressure to the brake pedal, and the check valve works like a hiccup — no air will go back in.

With the vacuum and pressure pump methods, you will need to bleed each line several times to make sure no air was moved through the system.

Have a friend you want to torture? Read on to learn about the wildly popular two-person pump-and-hold method.

Bleeding Brakes With Two People

The method of bleeding brakes with two people works by pushing on the brake pedal and releasing air through the bleeders simultaneously. In order for this method to work, the person who is depressing the brake pedal must listen carefully or risk sucking air back up into the lines— clear communication is key.

Here's how to bleed the breaks with a friend:

Advertisement

Step 1: Once the car is up on jacks and the wheels have been removed, take the rubber cap off each bleeder screw. Position your box-end wrench to loosen the bleeder valve, but don't do it yet. First, attach the clear tubing over the nipple of the bleeder valve and put the other end in a bottle to catch the fluid.

Step 2: Ask your friend to pump the brake pedal three times, and then hold the pedal down as far as it will go. Your friend must hold it there until you say it's time to release it.

Step 3: Once your friend is holding the brake pedal in the completely pressed down position, turn the bleeder valve 1/4 turn. This will release the brake fluid and air. Only keep the valve open a second or two before closing it off again by tightening the screw. Your friend will feel the pedal go toward the floor of the car. Once the screw is closed, ask your friend to release the brake pedal. Repeat this bleeding process until there are no air bubbles in the fluid that is in the clear, plastic tubing.

Step 4: After all the brakes have been bled, test the brake pedal for firmness. Make sure it does not feel spongy when depressed. Visually inspect all the bleeder screws for any signs of leakage.

Step 5: If everything checks out, replace the rubber caps on the bleeder screws, put your tires back on and take your vehicle for a spin. Be careful to test the brakes before heading out onto the open road. Use caution until you know your brakes are in good working order. [source: Comeskey]

Lots More Information

Related HowStuffWorks Articles

More Great Links

  • Allen, Mike. "How to Bleed Your Brakes." Popular Mechanics. 4/07 http://www.popularmechanics.com/cars/how-to/a1495/how-to-bleed-brakes/ (Accessed 4/29/23)
  • Comeskey, John and Walker, James. "How to Bleed Brakes - The Right Way." scR motorsports. (Accessed 4/29/23)http://www.brakes-shop.com/brakepedia/fluid/how-to-bleed-brakes-the-right-way
  • Dempsey, Wayne R. "Bleeding Brakes." DriveWerks. (Accessed 11/02/08) http://www.drivewerks.com/tech/mult_bleed_brakes2.htm
  • Morr, Tom. "Brake Bleeding." Valvoline. (Accessed 11/02/08) http://www.valvoline.com/carcare/articleviewer.asp?pg=ccr20011001bb